Ruthin Area
Devil's Gorge
Maeshafn Pot Hole Quarry Minera Quarry
World's End
Craig Arthur
Twilight Area
Pinfold
Monk's Buttress
Dinbren
Trevor Area
Pandy Outcrop Llanymynech
Pontesford
4
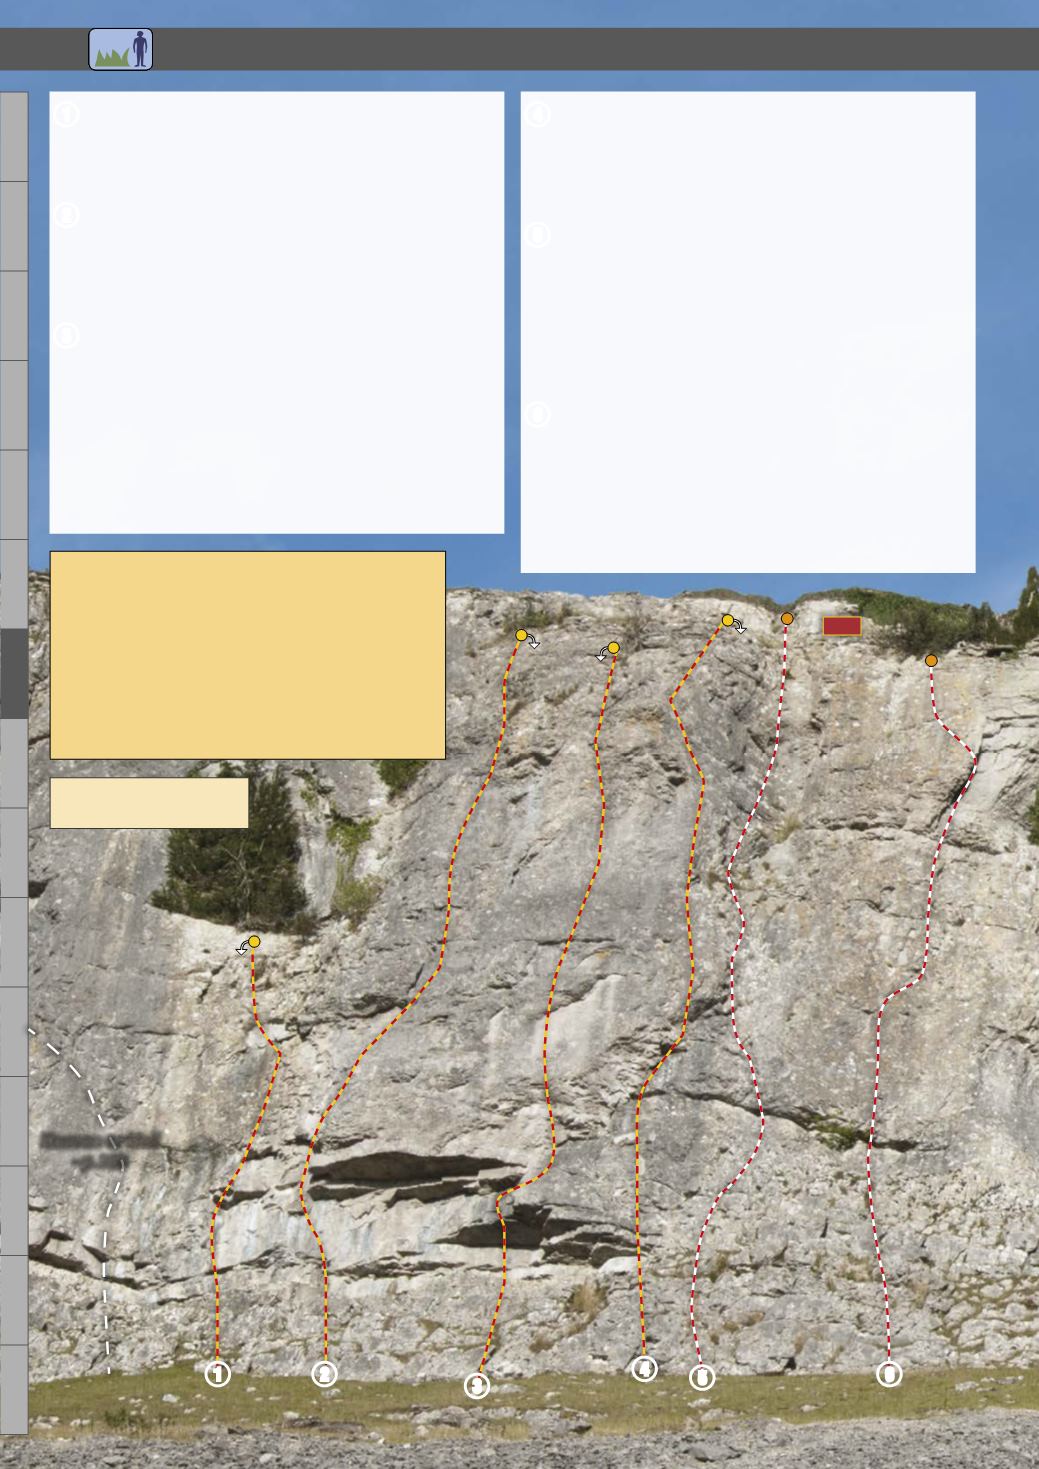
Delta Force.
2
fΩ
6c+
The right arete of the face gives an interesting face climb with
sustained but reasonable climbing to an intricate and fingery
finale on the exposed final bulge.
Photo on page 1
.
FA. Gary Gibson 3.6.2009
5
Badge. . . . . . . . . . .
hlsΩ
E2 5c
A good airy upper half is preceded by a serious lower section.
Start up broken ground and then move up to an overlap at the
horizontal break. Pull through the overlap (poor peg), and push
on carefully up the awkward wall to gain another peg. Easier
moves gain the base of a scoop and much better rock and
protection. Climb up the left wall of the scoop and exit with care.
FA. Stuart Cathcart, Tom Curtis 6.4.1975
6
Keeping Secrets .
1
tΩ
E5 6c
Start below a small bush in the break above broken ground.
Climb through the bulge, just right of the bush, to a peg, and
somehow reach a jug above. Go left to a flake and take this to a
break. Easier climbing leads to another larger horizontal break.
Move up the V-groove and exit left up the wall to finish at the
shrub-lined crag edge.
FA. Gary Gibson 2.9.1991
1
Beta Beware.
lΩ
6c+
A short and intense affair through a series of difficult overlaps to
an easier wall and tree belay. Loose.
FA. Gary Gibson 19.6.2011
2
Omegod.
lΩ
6c+
Gain the prominent and worrying flake from below and exit it
rightwards over a small overlap onto the wall above. The superb
blunt rib above leads to the belay.
FA. Gary Gibson 3.6.2009
3
Alpha Track Etch .
2
rtΩ
7b
An impressive intricate line that has some hard moves. Start
beneath the centre of the low offset roofs - the high first bolt
usually needs to be stick-clipped. Pull up through the weakness
to a slab. Undercut leftwards then make a very hard move to
reach better holds. Continue up the wall to a break then move
right along this before tackling the steep powerful capping bulge
to easier ground and the lower-off.
FA. Martin Crocker 2.6.1990. FA. (Direct as described) Lee Proctor
2.7.2005. The route originally moved right along the undercut flake.
1 2
3
4 5
6
104
RS$
C
35 min
Ten Area
The stacked roofs at the top of this area are taken
by the excellent sport route
Ten
. The other lines
on this section see little traffic. Most of the routes
start up easy-angled broken ground. The large
roof of
Ten
is high up on the crag around 100m
left of the tree at the base of the Nemesis Wall.
a
Access -
The 'no climbing restriction due to
nesting birds' may include this buttress - see
page 96.
Craig Arthur
Ten Area
40m
Heaven or Hell
- p.103


