Ruthin Area
Devil's Gorge
Maeshafn Pot Hole Quarry Minera Quarry
World's End
Craig Arthur
Twilight Area
Pinfold
Monk's Buttress
Dinbren
Trevor Area
Pandy Outcrop Llanymynech
Pontesford
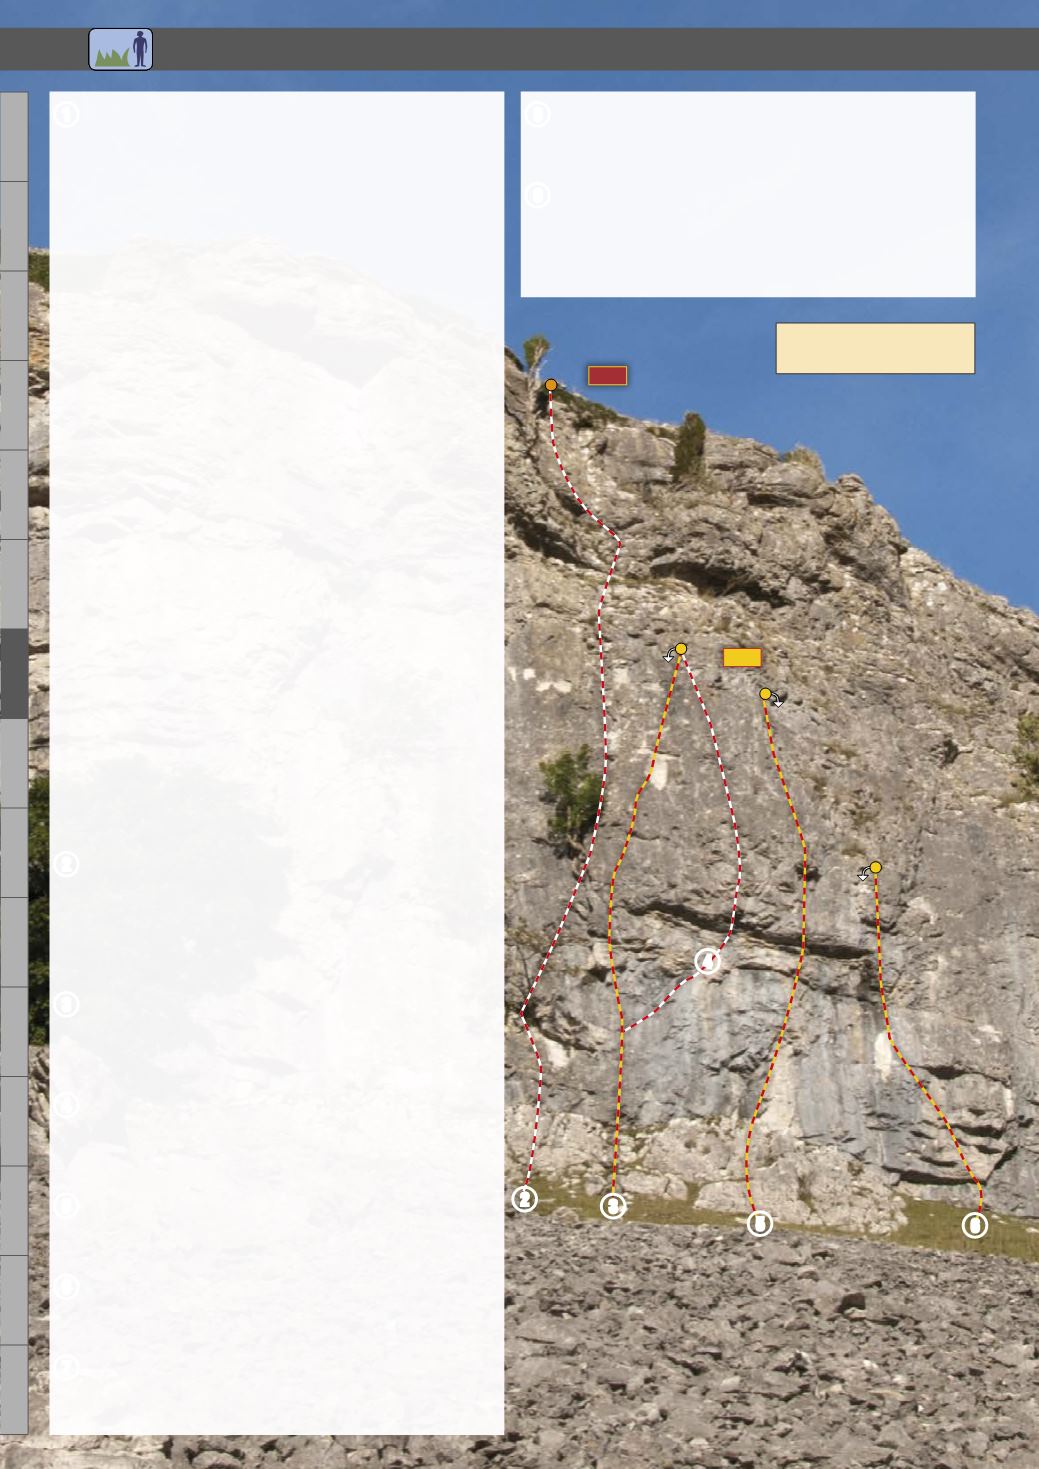
1
Craig Arthur Girdle.
3
slΩ
E2 5c
Not on topo. A massive undertaking that visits many sections of
the crag but also includes some poor rock and vegetation. Pitch
9 is the best.
1)
4b
, 25m. Climb
Arthur's Pillar
to the top of the corner and
then step right above an overhang to ledges. Move up and right
to the belay at the top of
The Fall and Decline's
first pitch.
2)
4b
, 25m.
Traverse right and down to a horizontal break (peg).
More traversing gains another peg at a niche. Leave the niche
and continue to belay as for
A Touch of Class
pitch 2.
3)
4a
, 25m. Move across the bay and climb down to another line
(peg). Traverse this to a small tree on
Stratagem
and belay.
4)
5c
, 15m. Climb down for 5m to pegs before traversing across
the wall to a tree belay at the top of
Swlabr Link
pitch 1.
5)
5b
, 26m. Climb a long way right and pick up two horizontal
breaks (peg). Go up past two pegs to small trees and then head
out to the arete on
Digitron
. Beyond the rock blanks out (peg).
Move right into the large yew tree and down to a belay.
6)
5b
, 18m.
Traverse right via a thin break to a small corner and
climb across the slab on
Alpha Track Etch
(two pegs) to belay
just before the upper section of
Badge
.
7)
5a
, 25m. Climb past a peg and beyond the V-groove of
Scary
Fairy.
Step down and across the wall below the stacked roofs of
Ten
(bolt). Thrash past one yew tree to another and belay.
8)
5a
, 26m.
Traverse along broken ground and down to an ash
tree. Continue along more grassy rock to a ledge. Move down
and traverse past fixed gear, round an arete, to a tree and belay
on the left-hand side of the Nemesis Wall.
9)
5a
, 25m. Step down after 3m, past a peg, and traverse to
below the dominating upper corner of the wall. Move right to a
small niche and then down to the main break. Follow this to and
around the arete and a belay at the top of
The Big Plop
pitch 1.
10)
5a
, 25m.
Traverse past a bush to a ledge (peg). Gain another
lower peg and continue on good holds to a large terrace. Finish
up a shattered wall and groove.
FFA. Stuart Cathcart, Tom Curtis, Malcolm Cameron in 1979
FA. Bob Dearman, Dave Riley, Tom Hurley (aid) 1969
2
The Hoax .
lΩ
HVS 5a
Climb to the first tree on
The Big Plop
. Move up right past
another large tree via a crack. Step right with care above the
tree, near the end of the crack, to a terrace. Climb up to an old
yew tree and finish right.
FA. Tom Curtis, Stuart Cathcart 14.5.1980
3
Tranche de Vie .
1
tΩ
6a+
A direct line up the left-hand side of the face with a technical
short wall above the bulge.
FA. Gary Gibson 1.9.2010
4
Voie de Bart .
ptΩ
E4 6b
Climb up to, and then right, along a ramp line to pegs in the
bulge above. Hard moves through the bulge lead to a lower-off.
FA. Steve Boyden, John Moulding 31.5.1985
5
Rubberbandman .
1
pΩ
7b
Power moves through the overhang are the key.
FA. Gary Gibson 31.5.1991
6
Finger Press.
Ω
6c
A short bouldery line finishing over a bulge.
FA. Gary Gibson 1.9.2010
7
Thumbs Down.
1
tfΩ
6c+
A direct line via hard moves in shallow scoop. Start via flake.
FA. Gary Gibson, Steve Fowler 27.9.2009
8
Under My Thumb.
1
tΩ
6c+
A neat wall pitch involving intricate face climbing.
FA. Gary Gibson, Neville Barker 9.6.1991
9
Cold Finger.
hΩ
E1 5a
1)
5a
, 16m. Climb rightwards up the crozzly, off-vertical wall to
a slim overlap. Traverse right to a terrace and tree belay.
2)
4b
, 16m. Move left and climb a broken wall and groove.
FA. Stuart Cathcart, Greg Griffith 20.2.1978
2 3
4
5
6
112
Craig Arthur
Rubberbandman Area
RS$
C
35 min
40m
20m


